1. What Is Grooving in Machining?
Grooving is where precision meets purpose. It’s the art of cutting narrow channels into metal parts—usually for sealing rings, snap rings, or just to make sure things fit exactly where they should.
Unlike general turning or milling, grooving occurs in tight spaces, with reduced tool clearance and increased risk. Too deep? The part’s ruined. Too shallow? It won’t function. This is not just “cutting a slot.” It’s high-stakes, small-scale engineering.
A good groove means the O-ring seals perfectly. A bad one? You get leaks, failures, and angry clients. Simple as that.
2. Types of Grooves
Grooves can be classified based on their location, function, and shape.
2.1 Classification by Location
This is directly based on the location of the groove on the workpiece.
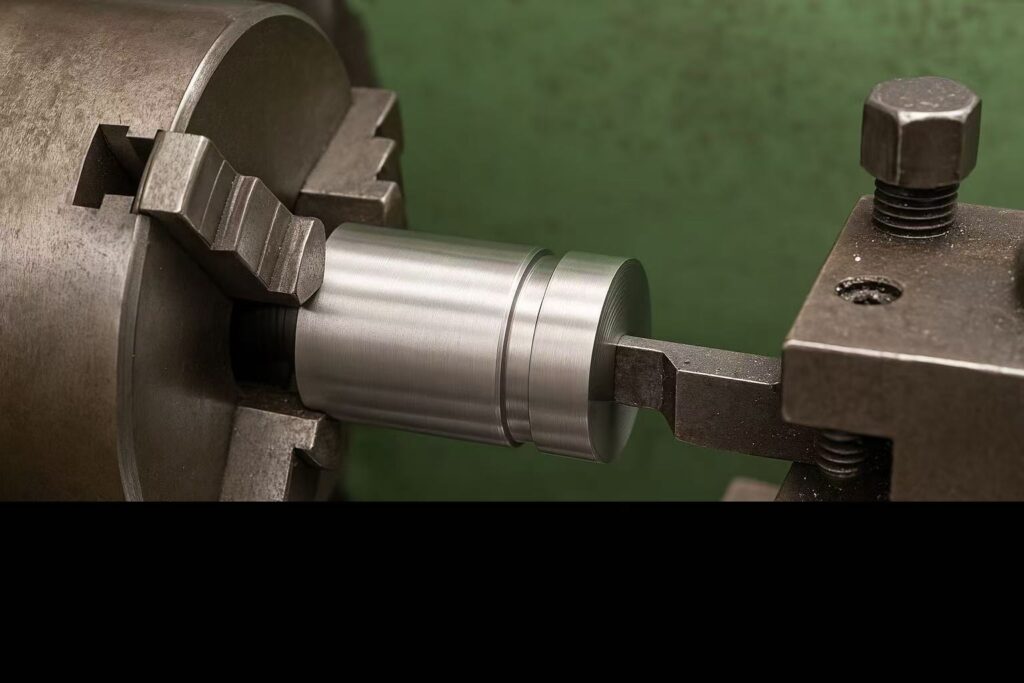
1) External Groove:
● A ring-shaped groove seen on the outer circumference of shaft-type parts. The groove walls are usually smooth and the width is uniform.
● Typical Applications: Relief grooves, sealing grooves, retaining ring grooves, etc.

2) Internal Groove:
● Grooves machined on the inner surface of a workpiece. Usually uses a dedicated internal grooving tool.
● Looking deep into a hole, you can see a ring-shaped groove on the inner wall. This is usually only visible from a specific angle.
● Typical Applications: Sealing grooves in hydraulic valve bores, internal retaining ring grooves, etc.

3) End Face Groove:
● A groove machined on the end face (flange face) of a workpiece.
● On the end faces of parts such as flanges and end caps, you can see annular grooves that look like “volcano craters”.
● The tool needs to move radially and axially simultaneously, and the tool structure is special to prevent interference with the workpiece.
● Typical Applications: End face sealing grooves, end face annular grooves for weight reduction, etc.

4) Circular–Arc Groove:
● Groove with a circular-arc bottom, it is usually machined directly using a forming insert.
● At the base of the step on the shaft, instead of a right angle, you see a smooth, rounded transition. The “groove” is rounded in shape.
● Typical Application: Fillets at the shoulders of shafts are used to reduce stress concentration and improve the fatigue strength of parts.

2.2 Classification by Function
The groove is classified according to its specific function in the mechanical part.
1) Relief Groove:
● A narrow groove pre-machined during thread machining or grinding to facilitate the withdrawal of the cutting tool (such as a threading tool or grinding wheel) without damaging the machined surface.
● Typically, at the end of a thread or in a section requiring grinding, there is a narrow groove that is wider and deeper than the thread itself.

2) Sealing Groove:
● A groove used to install elastic sealing elements such as O-rings and Glyd rings.
● Very regular rectangular or circular grooves.
● It requires extremely high dimensional accuracy (width, depth), shape accuracy, and surface finish.

3) Oil /Lubrication Groove:
● A spiral groove, or several straight, through grooves, seen inside the bore of a bushing or bearing housing.
● Used to store and transport lubricating oil, these grooves are typically not closed annular grooves, but rather spiral or straight grooves.

4) Grooving
● Grooving involves using a cutter to cut bar stock or to divide a long workpiece into several shorter ones.

5) Snap /Retaining Ring Groove
● Used for installing elastic retaining rings or snap rings to axially position bearings, gears, and other parts.
● The groove dimensions must match the standard retaining ring.

2.3 Classification by Shape
Based on the cross-sectional shape of the groove.
1) Rectangular Groove
● The most common groove type. The groove walls are perpendicular to the workpiece centerline, and the bottom is a flat surface.
● The outer circular groove and sealing groove mentioned above are typical rectangular grooves.
2) V-groove
● The cross-section is V-shaped, with a wide opening and a pointed bottom.
● Typical applications: Used for guiding, positioning, or as a starting groove for threads.

3) Circular–Arc Groove
● As mentioned earlier, the bottom of the groove is arc-shaped.
3. Machines and Tools Used in Grooving
Grooving can be done on various machines, but the most common is the CNC lathe. For complex or face grooves, CNC mills or multitasking machines are also used.
Here’s what makes grooving work:
● CNC Lathes
Perfect for external and internal grooves. The cutting tool moves radially to form the groove with precision.
● CNC Mills
Used for axial or face grooving, especially when the groove isn’t symmetrical around a center.
● Grooving Tools
Special inserts with fixed widths—typically carbide-tipped. The tool shape matches the groove profile exactly.
● Tool Holders
Rigid holders reduce vibration and ensure stability, especially important for deep or internal grooves.
● Coolant Systems
Grooving generates a lot of heat in a tight space. High-pressure coolant or air blast is essential for chip removal and tool life.
Pro tip: The shorter the tool overhang, the better. Always center the tool precisely to avoid chatter and uneven wear.
4. Process Parameters and Optimization
Grooving may look simple, but if your parameters are off, your tool breaks, the part overheats, or the groove ends up useless.
Here are the key factors to get right:
● Cutting Speed (Vc):
Too fast, and you burn the tool. Too slow, and you waste time. Typical range:
- Aluminum: 150–250 m/min
- Steel: 80–120 m/min
- Stainless: 60–100 m/min
● Feed Rate (f):
Low feed = better surface finish. High feed = faster cuts but more tool stress.
Start with 0.05–0.15 mm/rev and adjust based on material and depth.
● Groove Depth and Width:
Always match tool width to groove width. For deep grooves, use multiple passes—don’t push it in one go unless your setup is rock solid.
● Tool Overhang:
Keep it short. Long overhang = vibration = bad finish and shorter tool life.
● Coolant:
Use plenty, especially on stainless and deep internal grooves. Chip evacuation is half the battle.
● Cutting Strategy:
- Pecking: Ideal for deep internal grooves
- Continuous cut: Fine for shallow, external grooves
- Multi-pass: Best for wide or deep profiles
● Tool Wear Monitoring:
Grooving tools wear fast due to high side pressure. Check edge quality often or your tolerances will drift before you know it.
Bottom line? A groove is only as good as your control over the cut. Set it up right, and it runs smooth. Slack on the details, and it costs you time, tools, and money.
5. Grooving Different Materials
Not all metals groove the same. Each material brings its own set of challenges – and knowing how to handle them can save you tools, time, and customer complaints.
● Aluminum
- Easy to cut, but chips can stick to the tool and clog the groove. Use sharp inserts and high rake angles.
- Coolant is a must, especially for tight-tolerance grooves.
- Fast cycle times and smooth finish. Good for high-volume, cost-sensitive projects.
● Stainless Steel
- Tough and sticky.Tends to work-harden and kill tools fast.
- Use coated carbide inserts, lower speeds, and high-pressure coolant.
● Carbon & Alloy Steel
- Good machinability, but requires more cutting force.
- Use moderate speeds and strong, rigid setups.
- Adurable, cost-effective option for structural or mechanical parts that need reliable grooves.
● Brass & Copper Alloys
- Machines cleanly, but chips can bird-nest if feed is too low.
- Watch for dimensional drift on longer parts due to thermal expansion.
- Excellent groove surface finish- great for decorative or sealing components.
● Titanium & Superalloys
- Hard to groove, low thermal conductivity, high tool wear.
- Slow speed, low feed, constant coolant, and always multi-pass.
6. Design Considerations for Grooved Parts
The best way to avoid machining headaches? Get the groove design right from the start.
Here’s what matters when designing grooved parts:
1) Groove Size & Shape
- Keep groove width and depth within standard insert sizes.
- Overly deep or narrow grooves = more tool deflection, higher cost.
- Add proper radii at the groove corners- sharp edges break tools.
2) Location Matters
- Grooves near shoulders, steps, or undercuts are harder to reach.
- For internal grooves, give enough bore diameter for tool entry.
- Face grooves? Leave clearance around the edge for tool approach.
3) Tolerances & Finish
- Tight tolerances mean slower machining and more inspection time.
- Unless it’s sealing-critical, don’t over-spec it. Saves you money.
4) Material Behavior
- Thin walls? Soft metals? They may deform during grooving.
- Plan for clamping pressure and part deflection.
5) Assembly Function
- Grooves for O-rings, snap rings, or gaskets must be designed based on real-world use.
- Depth too shallow? It won’t seal.
- Too deep? The ring will rattle or pop out.
7. Common Challenges and Troubleshooting
Grooving looks simple – until it goes wrong. Below are some common challenges.
1) Chatter and Vibration
The problem:
When grooving tools stick out too far or the setup lacks rigidity, the tool starts to chatter. That means poor surface finish, uneven groove width, and a part that fails inspection.
Case:
Groove an internal seal slot on a stainless valve body – depth 3mm, width 1.5mm, bore only Ø20mm.
At first, we used a long tool with no support. Chatter ruined the finish, the groove undersized.
In the end, we had to rework everything with a shorter, custom-ground insert and high-pressure coolant.
Fix it:
- Keep tool overhang minimal
- Use rigid toolholders
- Reduce feed & speed
- Try peck grooving for deep slots
2) Chip Jamming in Deep Grooves
The problem:
Grooving throws chips into a narrow trench. If they don’t evacuate, they weld, pack up, and kill the tool or jam the machine.
Case:
We machined copper parts for a European client – face grooves, 4mm deep.
First batch: no air blast, chips stuck in the groove, insert chipped, parts scrapped.
Second batch: added compressed air + peck cycle – zero failures.
Fix it:
- Use pecking cycles for deep or blind grooves
- Add air blast or high-pressure coolant
- Widen the groove slightly if possible
3) Tool Breakage in Internal Grooving
The problem:
Internal grooves need small, thin tools that are easy to snap – especially in tough materials like Inconel or titanium. Add poor chip flow and you have a recipe for disaster.
Case:
A client sent a rush order with internal grooves in titanium tubes. Our workshop broke 3 inserts on the first 5 pcs.
Solution? Switched to a coated, reinforced shank tool, slowed down the RPM, and ran in 3 passes. All passed later.
Fix it:
- Use reinforced shank tools
- Slow down speed, increase lube
- Never groove full depth in one shot
4) Wrong Groove Size = Assembly Failure
The problem:
Groove too wide? O-ring won’t seal. Too narrow? Can’t press-fit.
Snap ring groove off by 0.1mm? Ring pops out.
Case:
A client in Germany reported oil leakage in their hydraulic actuator.
We traced it back: their groove spec changed in V2 drawing, but our team used the V1 version. The groove was 0.2mm deeper than spec, which caused O-ring not to compress properly = leak.
Fix it:
- Always double-check latest drawings
- Ask for function-based specs, not just numbers
- Do a test-fit or CMM scan before full batch
5) Heat and Burrs on Face Grooves
The problem:
Face grooves build heat fast. If coolant is weak or tool is dull, you get burrs that make the groove look clean but actually block assembly.
Case:
We sent stainless flanges with face grooves to a Japanese client. Visually perfect. But during their gasket install, burrs blocked the seal from seating.
Fix it:
- Keep inserts sharp, replace earlier than usual
- Deburr with a pass or by hand if tolerance allows
- Run at lower feed for final pass
8. Applications of Grooving in Industry
Grooves show up everywhere – from massive oil rigs to tiny medical devices. And when they fail, things leak, break, or stop working. That’s why grooving isn’t just “nice to have” – it’s mission-critical.
Here’s where grooving really earns its keep:
1) Hydraulic Systems (Cylinders, Valves, Pumps)
Grooves hold O-rings and backup rings. If the groove isn’t right, your seal fails. And when that happens in a hydraulic press or forklift? Goodbye pressure, hello oil mess.
💡 Use case: We supply face grooves on stainless flanges for a European pump brand – they need mirror-finish grooves, ±0.02mm deep. Zero tolerance for leaks.
2) Automotive Components
Snap ring grooves on shafts, pistons, and transmissions keep parts in place under heavy load and vibration. If the ring slips out, you’ve got a failed gearbox.
3) Aerospace & Defense
Face grooves, sealing grooves, and pressure relief cuts – all with tight specs. Materials like titanium and Inconel don’t make it easier.
4) Medical Devices
Tiny parts, micro-grooves. Sometimes 0.3mm wide, in stainless or titanium, with full traceability.
5) Oil & Gas Equipment
High-pressure flanges, sealing grooves, and anti-blowout features in nasty environments.
6) Electronics & Consumer Devices
Small grooves for alignment, fit, or aesthetic function. Tolerances still matter – especially on visible parts.
💡 Use case: We did aluminum grooves for a high-end audio brand. They wanted function + flawless finish. We did diamond-tool final pass—looked like a mirror.
Bottom line:
Grooves are not “just a detail.” They’re where parts seal, lock, and survive stress. If your groove fails, the whole part fails. That’s why we treat grooving like a core competency – not an afterthought.
And if you’re sourcing grooved parts, you want a supplier who understands that. Not just someone with a CNC, but someone who’s been through the failures—and learned how to avoid them.
9. Cost, Efficiency, and Maintenance
Let’s be real – grooving can eat your margin alive if you don’t know what you’re doing. Tool wear, rework, scrap, downtime… they add up fast.
Here’s how to keep your grooving operation lean, sharp, and profitable.
1) Where the Costs Really Come From
It’s not just machine time.
Grooving costs hide in:
- Tooling: Grooving inserts wear faster than turning tools, especially on hard materials or tight-radius corners.
- Setup Time: Internal or face grooves need special holders and precise zeroing.
- Scrap & Rework: One tiny groove error = full part reject.
- Inspection: Tight tolerances mean more QC time, maybe CMM checks.
- Coolant & Chip Removal: Not optional—especially on deep or enclosed grooves.
2) How to Make Grooving Efficient
Want to keep cost-per-part low? You have to optimize like a maniac.
- Use multi-groove tools: Cut multiple grooves in one pass if design allows.
- Set tool life timers: Don’t wait for visible wear—change inserts proactively.
- Use pecking cycles smartly: Too short = slow, too long = tool break.
- Automate QC if volume is high: Laser scan groove width, in-line check depth.
- Bundle parts with same groove size: Fewer tool changes = more uptime.
💡 Case: We had a client needing 50,000 aluminum housings with a 1.2mm face groove. By switching to a 4-groove insert and reducing insert changes, we cut 11% off cycle time and saved them $18k in tooling over 3 months.
3) Tool & Machine Maintenance Tips
Grooving wears things out faster. Here’s how to stay ahead:
- Replace inserts early- dull tools scrape, don’t cut.
- Check toolholder alignment weekly- especially for internal tools.
- Flush coolant lines- chip clogs = tool death.
- Inspect spindles and turret runout monthly- micro errors show up big in grooves.
- Record tool life per material- build your own data set. It pays back fast.
If you’re a buyer or PM, ask your supplier:
- How do you control groove tolerances?
- Do you track tool life data?
- What’s your backup plan if the groove tool breaks mid-batch?
If they don’t have answers, you’re buying risk.
10. Future Trends and Innovations
Grooving may be one of the oldest machining processes – but it’s changing fast. The companies that keep up are slashing costs, improving consistency, and winning the high-margin projects.
Here’s what’s shaping the future:
1) Smart Tooling & Real-Time Monitoring
Modern CNC machines now track tool load, vibration, and wear in real-time.
If the insert dulls or chatter begins, the machine auto-adjusts or pauses.
📈 Result: Less scrap, more predictable tool life.
2) Multi-Tasking Machines
Machines that turn, mill, groove, and inspect in a single setup are cutting changeover time by 30 – 50%.
📈 Result: Faster delivery, especially on complex parts.
3) Micro-Grooving & Medical Applications
Parts in medical, electronics, and optics are demanding grooves under 0.5mm – sometimes in titanium or cobalt-chrome.
📈 Result: Shops that can handle these get premium orders, low competition.
4) Laser-Assisted Grooving
Emerging tech combines traditional cutting with localized laser heating to reduce tool wear – especially useful on heat-resistant alloys.
📈 Result: Better finish, longer insert life on nasty materials.
5) Simulation-Driven Setup
More shops are using CAM simulation + digital twins to optimize grooving before touching a part.
📈 Result: Fewer crashes, faster programming, better first-pass yield.
11. Conclusion
Grooving isn’t just a small cut – it’s a critical feature that can make or break your part. From sealing performance to assembly fit, the groove is where precision becomes function.
But precision doesn’t happen by accident. It takes the right tools, right machines, right parameters – and the experience to know what works.
That’s where we come in. We don’t just machine grooves. We understand what they’re for, how they fail, and how to get them right the first time.
12. FAQ
Q1: Can I use the same groove design for aluminum and stainless steel?
A: You can, but it’s risky. Stainless requires more clearance due to springback and tougher machining. Always adjust depth and width based on material behavior.
Q2: Why is grooving more expensive than general turning?
A: Because it’s higher risk and harder to control. Groove tools wear faster, setups are more sensitive, and a small error usually means full part scrap.
Q3: I only have a rough sketch – can you help design the groove?
A: Absolutely. Just tell us the function (seal? snap ring? clearance?) and we’ll suggest standard dimensions, tolerances, and tool-friendly geometry.
Q4: What’s your tolerance capability for internal grooves?
A: ±0.02 mm is standard for us. For smaller bores or medical parts, we’ve hit ±0.01 mm with CMM verification.
Q5: What causes burrs or poor finish in grooving?
A: Usually tool wear, lack of coolant, or incorrect feed. We monitor tool life and use finishing passes if your parts require smooth, burr-free grooves.
Q6: What if the groove is too deep to cut in one go?
A: We run it in multiple passes, often with pecking cycles. It protects the tool and improves chip removal – especially on deep internal grooves.
Q7: Can you machine multiple grooves in one part?
A: Yes, and if they’re the same width, we can often do them in one pass with multi-tip tools. Saves you time and cost.